How we built a custom checkout experience on top of our payment partner SDK, completely in React Native.
At Clear we build our apps using react-native (a cross-platform app development framework) and on the same line, we have built our mutual fund app, Black. The app primarily has two modules ITR and Mutual Funds purchase. On the mutual fund's side, although we support 40+ AMC’s, our Payment experience was not great, so we decided to improve the checkout and payment experience for our users.
We already had checkout and payment flow on our app, but we were completely relying on our external payment partner. The problem with this approach was that we were not in control of UI/UX for eg: default payment options, previously saved information, color scheme, error handling etc.
The High level requirements are mentioned below,
- Display and handle multiple Payment modes (UPI/Net Banking/Pay later)
- Have configurable error handling without App release or Code-Push
- Handle downtimes of Banks, UPI handles, and UPI apps
- Error reporting and alerts from app to our internal channels
- Handle payments from multiple bank accounts of users to adhere to TPV (a compliance requirement for mutual fund apps)
- Seamlessly add a new mode of payment without having to modify much of previous code.
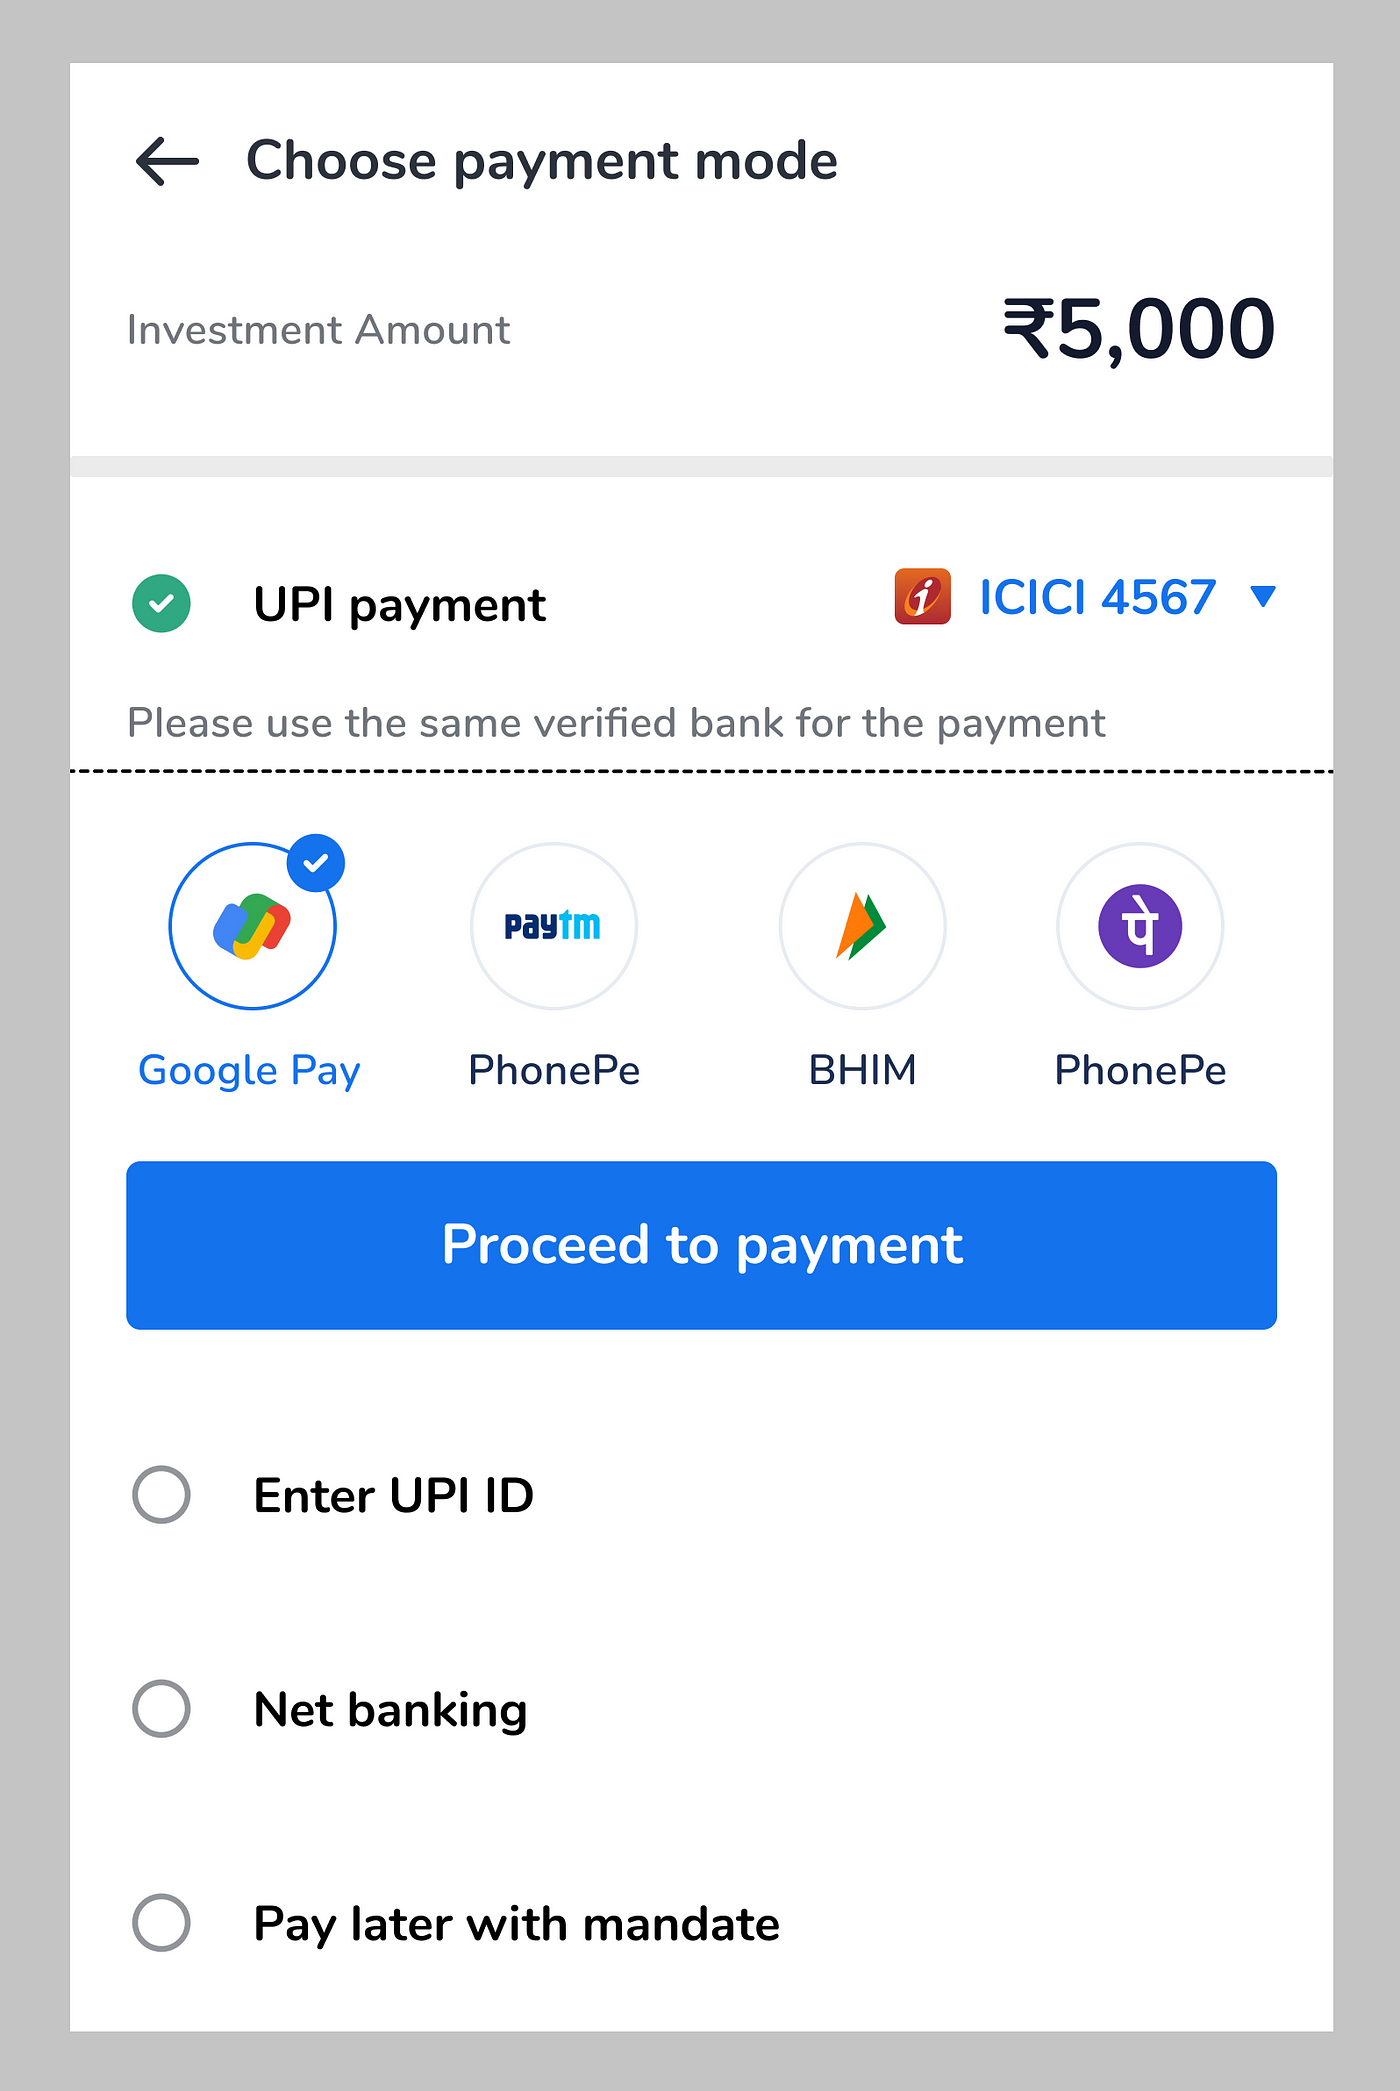
UI/UX
With the design team coming up with the UX, it was time for engineering to kick off the work. Before directly diving into the Code, States, and Hooks, let’s have a look at the design prototypes,
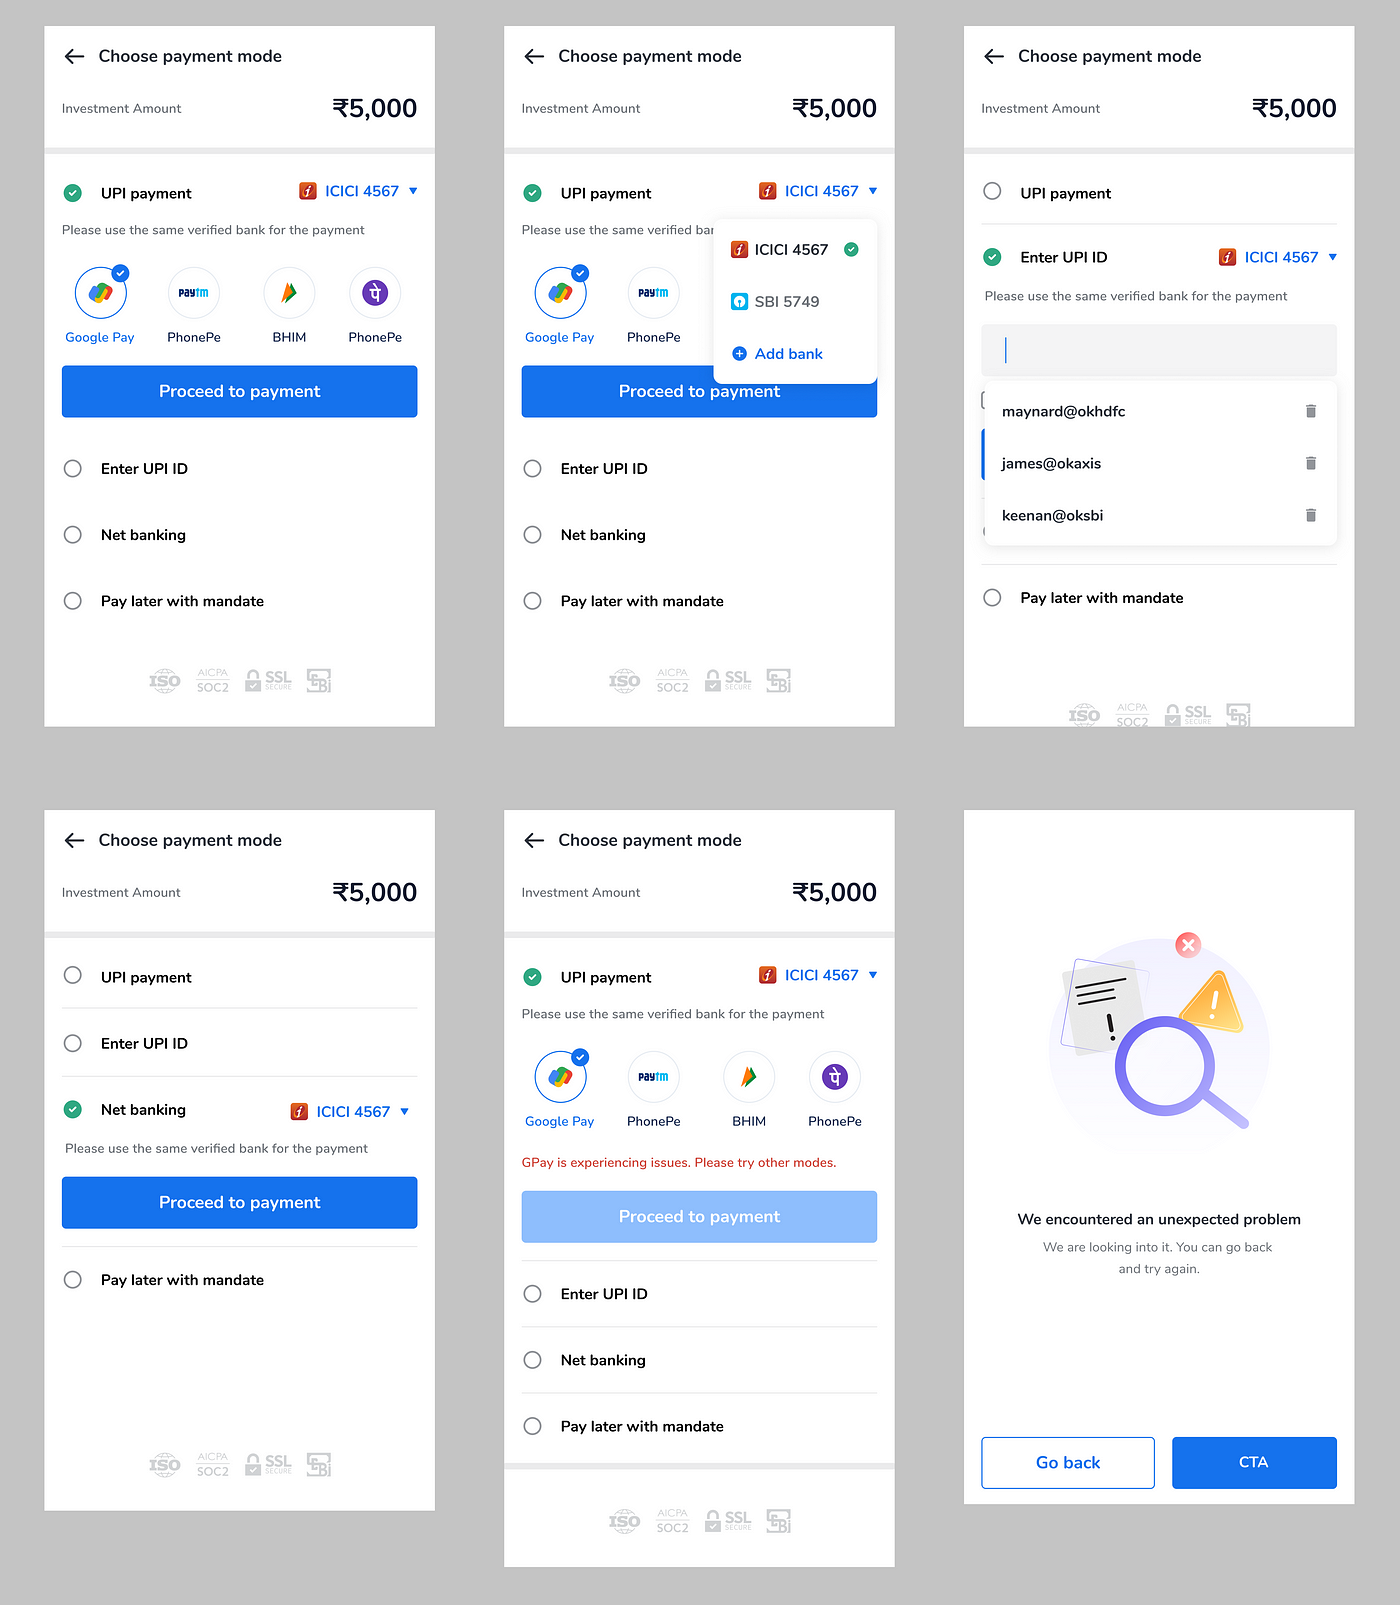
The screen primarily lists various payment modes, and on selecting a particular mode the actions and details of that mode are shown by expanding the component, sort of a drop-down experience. There is also a popup to select a bank account against each payment method and Finally, an error screen needs to be configured based on various error codes.
Code design and Architecture
Let’s go through the various methods and approaches used, to achieve the design and simultaneously meet the initial guidelines that were laid out, in the following sections.
Componentization
As we all know componentization is one of the basic principles of react, which makes it one of the preferred frameworks for front-end design. So the first task here would be to divide the whole page into small components that can act independently.
So at first sight we would roughly componentize the page as,
- Component for each payment method (UPI app, UPI collect, and Netbanking)
- Bank popup component
- Suggestion Input component (for UPI collection)
But the problem with the approach this that, in each payment method component there would be certain parts of code getting repeated,
- Header part and bank component
- Logic to expand and shrink the method’s contents
We can think of putting the header UI as a separate component and including it in each method’s component,
But still, the logic of expanding/shrink will be duplicated in each component which will be not a good scalable solution. React native allows us to pass components as children, hence we can use this approach to arrive at a scalable solution. So the entire payment component can be decoupled into parent and child components.
The parent component will take care of expanding, shrinking, bank account selection and each child component will take care only of the particular payment method’s UI, validation methods, etc. Hence the final code looks as follows,
By this approach we have decoupled the logic and UI, hence in the future adding a new method would be very much simple — add a new component for payment and wrap it up with this parent component.
Few more De-Coupling
We are relying on our payment partners currently for fetching the UPI apps installed on the user’s device. Hence in the UPI app section, the UPI app list has also been decoupled and designed as a separate component, which fetches and displays the list of UPI apps. By this approach, in future, if any changes occur in the payment partner’s SDK, the change would be required only in this component and the core payment component would be unaffected. This UPI apps component also encapsulates the logic of preferential sorting where few apps are shown on preference.
Lifting the ‘state’ up and use of Context API
React recommends lifting the state up to a common ancestor so that various components can share the common data. Here also on the payments page, we have lots of states and data that manage various UI components. For eg. selected payment method, selected bank account, UPI suggestions, downtime data, last successful payment data, etc.
Passing these values to individual components would become unmanageable and will increase the code lines on the parent page. To overcome this we would be using the context API provided by react-native that allows to share common data across components.
By this approach, each component will de-structure and take the required information internally and there would be no dependency on the parent page to pass the required props for components individually.
The function of the payments page will only be to initiate the transaction on the payment partner’s side, based on the selected payment method, and handle success and error cases.
Error handling
As laid out initially we wanted to have a configurable error handling experience, without app release or code-push. To achieve this we have hosted a configuration file in our internal system to configure the error experience against each error code from SDK. Let’s see the structure of JSON to have a better understanding,
As we can see against each code, there are fields that describe the error message to be shown along with button labels and actions. For eg: for bank_account_invalid code the user would see a page with the message “Your bank accounts are invalid…” message and 2 buttons which take the user to add bank and profile pages respectively.
But fetching this file in-app and finding the error codes and info would be an inefficient way of doing things. Here we have leveraged our GraphQL server infra to do this piece of work. Every time there is an error from SDK, the app queries out the GraphQL server for the action, the server in turn responds only with the piece of JSON against the error scenario.
Error reporting
By the above approach, we were also able to handle error reporting to our internal channels. Once the app reports an error to the GraphQL server, the server pushes some severe error scenarios along with user and session info, to our internal channels for manual intervention. This error reporting, without GraphQL server, would have been a difficult task. The errors are also logged and kept for future reference or debugging.
Benefits
This coding approach has helped us a lot in testing the release of the payment as we could test the individual components thoroughly and release it bug-free. The approach also made sure that, there were no severe hiccups faced while scaling up our new payments page to our entire user base.
Later when we added a new custom payment option of “Pay Later” not even a single existing code was touched to accommodate the new method.
Taking it to next level 🚀
We are constantly in touch with our other payment partners, to arrive at a solution where this page can be scaled to support payments through other partners as well.
Adding a configuration against each payment method and each bank for enabling and disabling the method, as it has come to our notice some of the banks do not support the compliance (verification of user identity) against certain methods.